Resetting the Windows 11 network adapter can resolve many connectivity issues, such as slow internet, dropped connections, or inability to connect to Wi-Fi or Ethernet. If you’re experiencing network problems, a network adapter reset can refresh your system’s network settings and restore functionality. In this article, we’ll walk you through multiple methods to reset the Windows 11 network adapter, explain when to use this troubleshooting step, and answer common questions to ensure you’re back online in no time.
Why Reset Your Windows 11 Network Adapter?
Network issues can stem from corrupted settings, outdated drivers, or software conflicts. Resetting the network adapter clears these configurations, allowing Windows 11 to re-establish a fresh connection. Common scenarios where a reset might help include:
- Wi-Fi or Ethernet not connecting.
- Slow or unstable internet speeds.
- Error messages like “No Internet Access” or “Limited Connectivity.”
- Recent system updates or software installations causing network disruptions.
Before diving into the reset process, ensure you’ve tried basic troubleshooting steps like restarting your router or checking your internet connection. If those don’t work, resetting the network adapter is a powerful next step.
Methods to Reset Windows 11 Network Adapter
Below are several methods to reset your network adapter in Windows 11. Each method is straightforward and designed for users of all technical levels. Follow the steps in order, starting with the simplest approach.
Method 1: Reset Network Settings via Windows Settings
Windows 11 offers a built-in network reset feature that clears all network configurations and reinstalls adapters. This is the easiest and most comprehensive way to reset your network adapter.
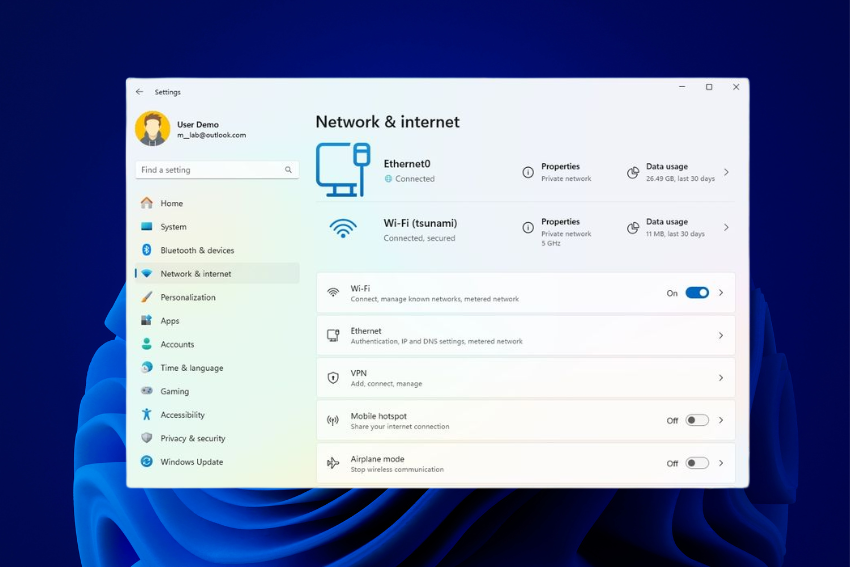
- Open Settings: Press Windows + I to launch the Settings app.
- Navigate to Network & Internet: Click on “Network & internet” in the left sidebar.
- Find Advanced Network Settings: Scroll down and select “Advanced network settings.”
- Select Network Reset: Look for “Network reset” and click it.
- Confirm the Reset: Click the “Reset now” button. A warning will appear, noting that this will remove all network adapters and reset settings to default.
- Restart Your PC: After confirming, Windows will reset the network adapter and prompt you to restart your computer. Save any open work before proceeding.
- Reconnect to Your Network: After restarting, reconnect to your Wi-Fi or Ethernet network. You may need to re-enter your Wi-Fi password.
Note: This method resets all network settings, including saved Wi-Fi passwords and VPN configurations. Be prepared to set these up again.
Method 2: Disable and Re-enable the Network Adapter
If you want a less invasive approach, try disabling and re-enabling the network adapter through Device Manager.
- Open Device Manager: Right-click the Start button and select “Device Manager.”
- Locate Your Network Adapter: Expand the “Network adapters” section to find your Wi-Fi or Ethernet adapter (e.g., Intel Wireless, Realtek PCIe).
- Disable the Adapter: Right-click the adapter and select “Disable device.” Wait a few seconds.
- Re-enable the Adapter: Right-click again and choose “Enable device.”
- Test Your Connection: Check if your network is working. If not, try another method.
This method is quick and doesn’t affect saved network settings, making it a good first step for minor issues.
Method 3: Reset Network Adapter via Command Prompt
For advanced users comfortable with command-line tools, you can reset the network adapter using Command Prompt to flush network configurations.
- Open Command Prompt as Administrator: Type cmd in the Windows search bar, right-click “Command Prompt,” and select “Run as administrator.”
- Run Network Reset Commands: Enter the following commands one by one, pressing Enter after each:
- netsh winsock reset
- netsh int ip reset
- ipconfig /release
- ipconfig /renew
- ipconfig /flushdns
- Restart Your PC: After running these commands, restart your computer to apply the changes.
- Check Connectivity: Test your internet connection after the reboot.
These commands reset the Windows Socket (Winsock) catalog, IP settings, and DNS cache, which can resolve deeper network issues.
Method 4: Update or Reinstall Network Drivers
Outdated or corrupted drivers can cause network problems. Updating or reinstalling them can mimic a reset by refreshing the adapter’s software.
- Open Device Manager: Right-click the Start button and select “Device Manager.”
- Find Your Network Adapter: Expand “Network adapters” and locate your device.
- Update Driver: Right-click the adapter, select “Update driver,” and choose “Search automatically for drivers.” Follow any prompts to install updates.
- Reinstall Driver (if needed): If updating doesn’t work, right-click the adapter, select “Uninstall device,” then restart your PC. Windows will automatically reinstall the driver.
- Check for Manufacturer Drivers: For best results, visit your PC or adapter manufacturer’s website (e.g., Dell, HP, Intel) to download the latest driver manually.
Method 5: Troubleshoot via Windows Network Troubleshooter
Windows 11 includes a built-in troubleshooter that can automatically detect and fix network adapter issues.
- Open Settings: Press Windows + I.
- Go to Troubleshoot: Navigate to “System” > “Troubleshoot” > “Other troubleshooters.”
- Run Network Troubleshooter: Find “Network Adapter” and click “Run.” Follow the on-screen instructions.
- Apply Fixes: If issues are detected, the troubleshooter will suggest fixes. Apply them and test your connection.
Post-Reset Steps
After resetting your Windows 11 network adapter, take these steps to ensure everything works smoothly:
- Reconnect to Wi-Fi or Ethernet: Enter your Wi-Fi password or plug in your Ethernet cable.
- Check for Windows Updates: Go to Settings > Windows Update and install any pending updates, as they may include network fixes.
- Test Multiple Websites: Verify your internet works by visiting several websites or running a speed test.
- Reconfigure VPNs or Custom Settings: If you use a VPN or custom DNS, set them up again.
Tips to Prevent Future Network Issues
- Keep Drivers Updated: Regularly check for driver updates via Device Manager or your manufacturer’s website.
- Restart Your Router Periodically: Power cycle your router every few weeks to refresh its settings.
- Avoid Conflicting Software: Some VPNs or antivirus programs can interfere with network settings. Temporarily disable them to test connectivity.
- Use a Reliable DNS: Switch to a public DNS like Google (8.8.8.8) or Cloudflare (1.1.1.1) for faster and more reliable connections.
Conclusion
Resetting your Windows 11 network adapter is a reliable way to troubleshoot and resolve network connectivity problems. Whether you use the Settings app, Device Manager, Command Prompt, or the built-in troubleshooter, these methods can help you get back online quickly. By following the steps outlined above and taking preventive measures, you can maintain a stable network connection. If issues persist, consider contacting your ISP or a professional technician for further assistance.
FAQs About Resetting Windows 11 Network Adapter
Will resetting my network adapter delete my files?
No, resetting the network adapter only affects network settings and configurations. Your personal files, apps, and other data remain untouched.
How long does a network reset take?
The reset process typically takes 1–2 minutes, followed by a mandatory restart. Reconnecting to your network may take an additional minute.
What should I do if resetting doesn’t fix my issue?
If resetting the network adapter doesn’t work, try rebooting your router, checking for Windows updates, or contacting your ISP. You may also need to update or reinstall drivers (see Method 4).
Can I undo a network reset?
You cannot directly undo a network reset, but you can manually reconfigure your network settings, such as re-entering Wi-Fi passwords or setting up VPNs.
Is it safe to reset my network adapter?
Yes, resetting the network adapter is a safe troubleshooting step. It’s a built-in Windows feature designed to fix connectivity issues without harming your system.